Add your UserClouds credentials
This article shows you how to customize the code in your sample app with your UserClouds credentials, ready to use in your own application. It assumes you have already downloaded the SDK and familiarized yourself with it by using the sample app. If you have not done this, check out our Sample App Guide here.
The code in the sample app can easily be adapted for implementation in your application. All you need to do is create your UserClouds account and replace the sample app's credentials with your own.
That said, the sample app has been designed to keep the code as simple and easy to follow as possible - so please do apply actual software engineering practices from any code you derive from it..!
1. Create your UserClouds account
UserClouds is invite-only right now. If you don’t have an invite, please email [email protected]. Click the link in your email invite and create a username and password.
2. Name your company and tenant
If you’re setting up your company’s account with UserClouds, you’ll be prompted to name your company and your first tenant.
- A company is a collection of users and tenants. It allows you to group applications together and collaborate with team-mates. Typically, customers set up one company for their... company.
- A tenant is a primary data scoping primitive that can represent a pool of end users. Typically, companies set up one tenant per environment, so a common configuration is three tenants:
development,stagingandproduction. You must have at least one. Each tenant has its own databases, its own region layout and its own configuration for each UserClouds service. Tenants are completely isolated, so there is no dataflow between them.
3. Copy over your TenantURL
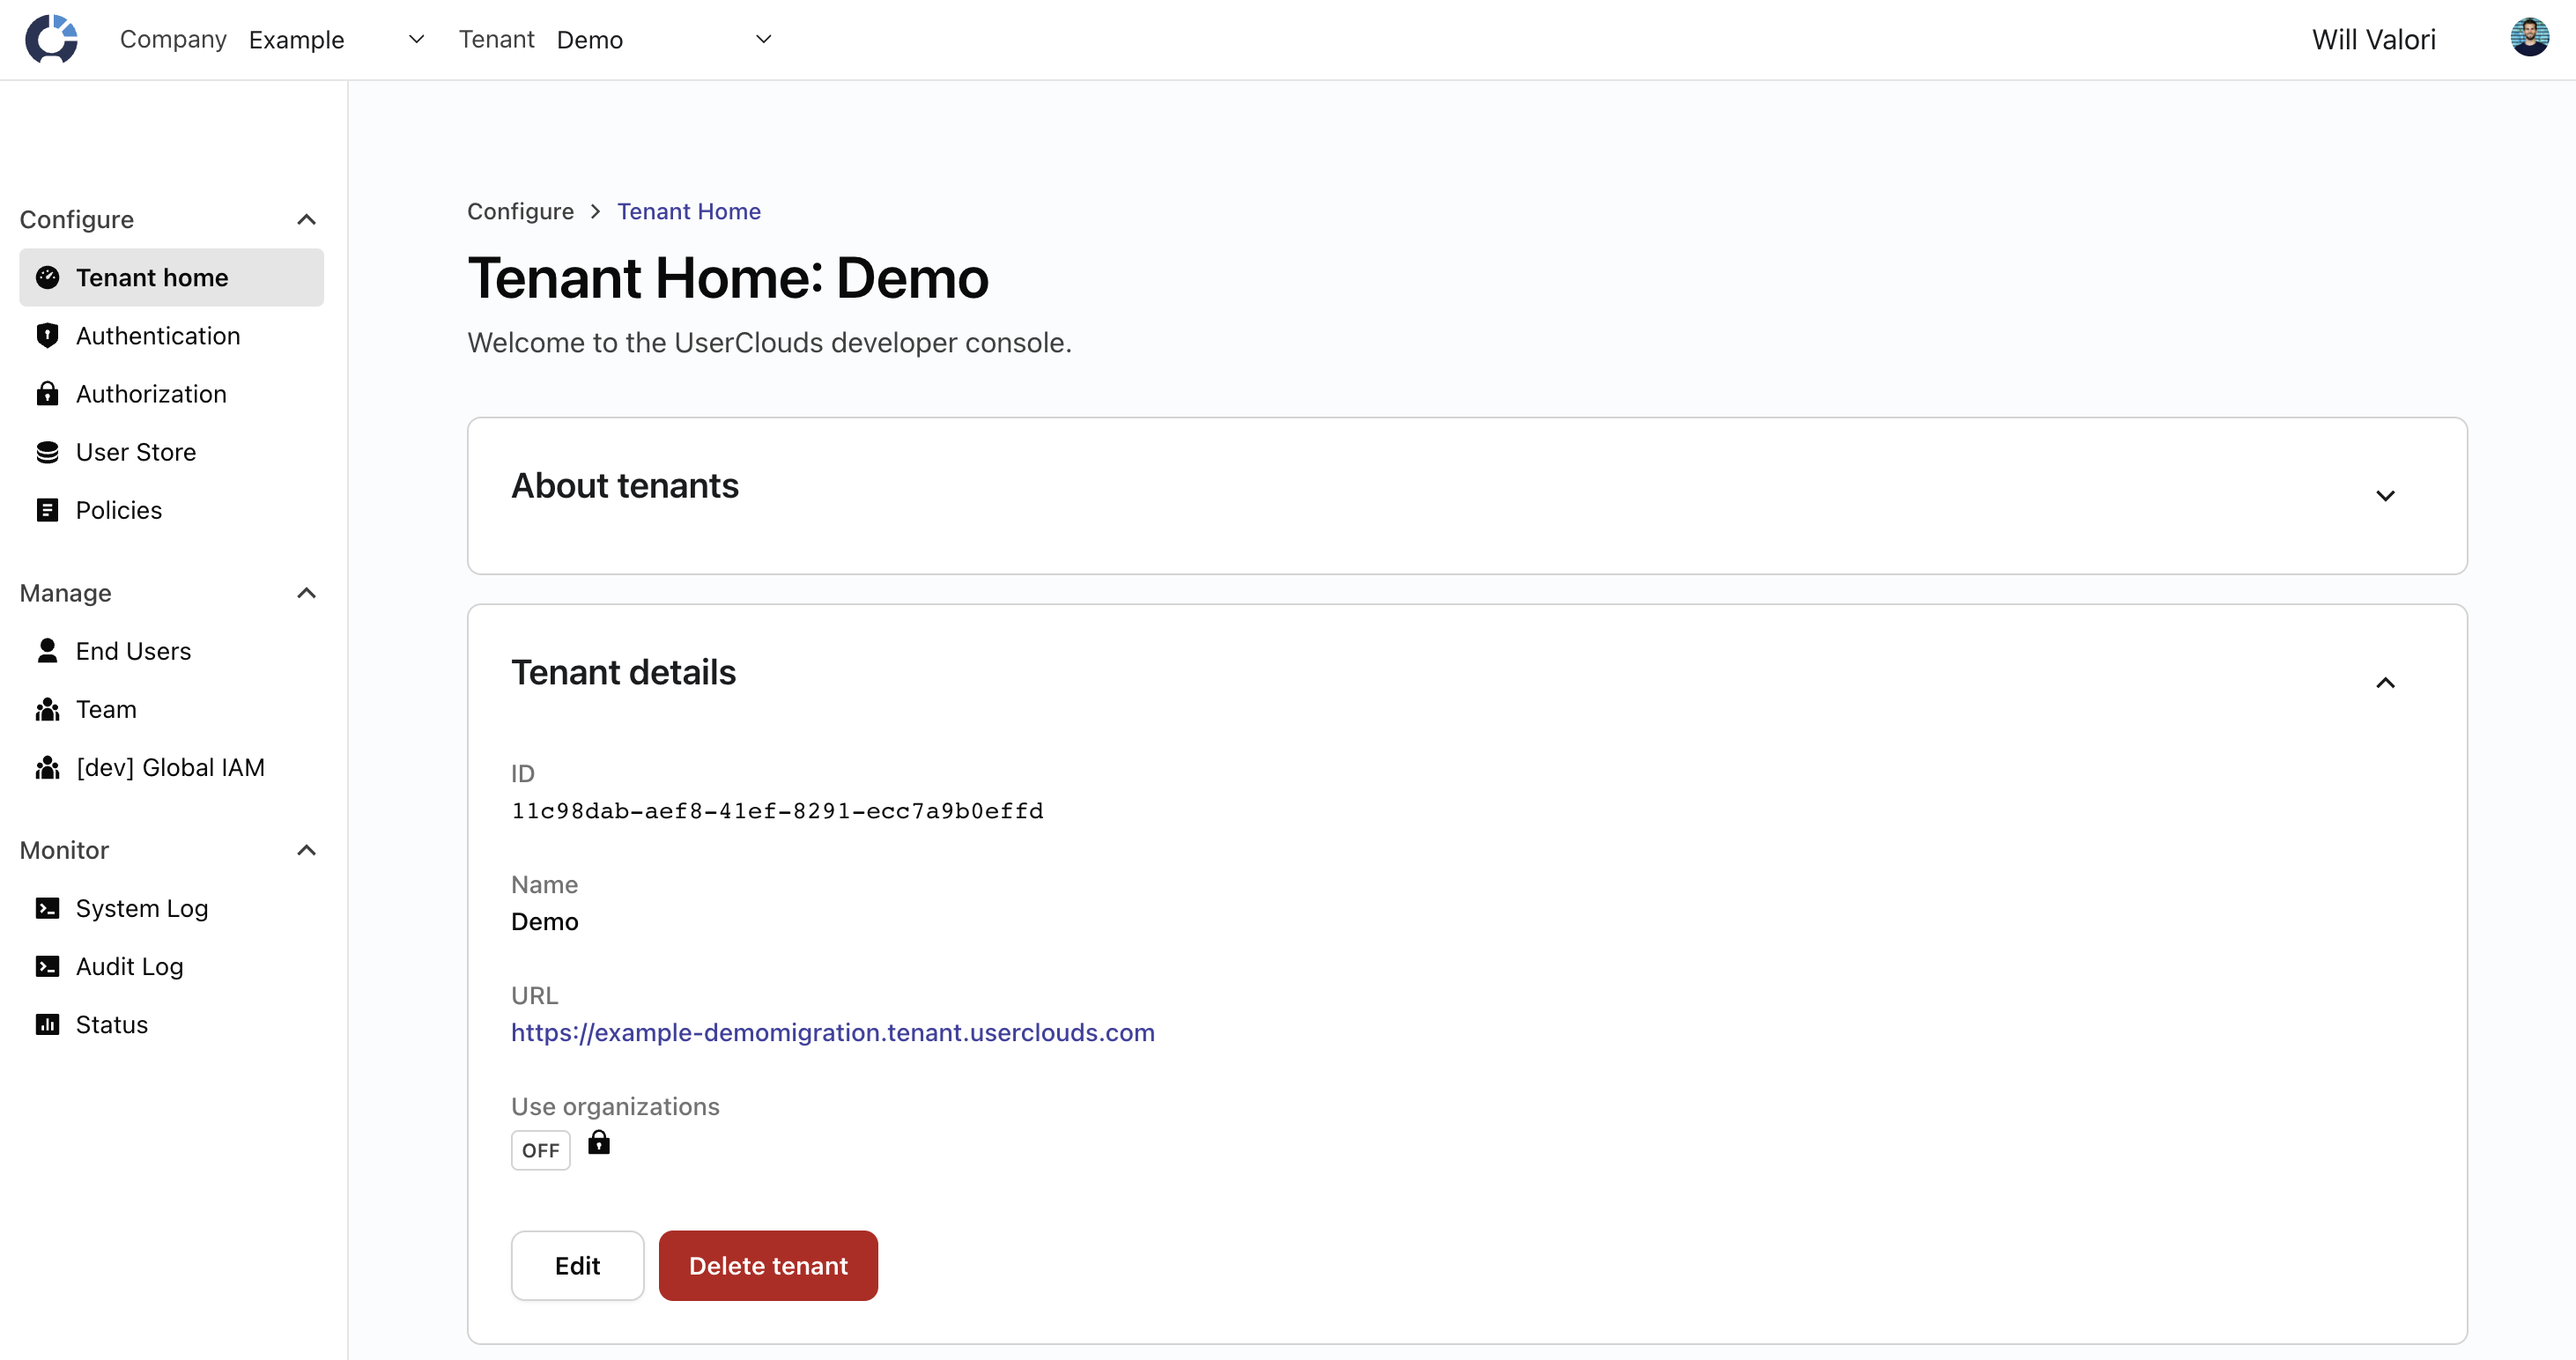
Select a tenant you would like to work on in the Tenants drop down in the top nav of the UserClouds Console. Go to Tenant Home and copy the TenantURL from the Tenant Details Card.

After creating your company and tenant, select your tenant from the top nav and copy the URL from the "Tenant Details" card.
Find this line of code in line ~18 of your sample app, and replace the sample app's tenantURL with your own:
const url = "https://sample.tenant.userclouds.com"
4. Copy over your Client ID and Client Secret
Next, you'll need to copy over your Client ID and Client Secret from the UserClouds Console. With the same tenant selected, click Authentication in the left hand nav. Then, in the Applications Card, select [TenantName] Default App. You will find your Client ID and Client Secret in the Application Settings card.
Copy your Client ID and Client Secret into lines ~19 and ~20 in your sample app, replacing the sample app's credentials with your own.
const clientID = "5f107e226353791560f93164a09f7e0f"
const clientSecret = "2ftQe4RU7aR/iStpcFf3gfiUjnsbWGFY0C9aWkPzDqT14eyp23ysKuI6iBbOAW/O"
Great job! You've now added your tenant's credentials to the sample app's code. You can now use your own instance of Tokenizer. Of course, you will need to repeat this step for each tenant that you create.
To learn more about authenticating to UserClouds APIs, see the API reference article on Connecting to Our APIs.
Updated over 1 year ago
