Explore the Tokenizer UI
This optional tutorial walks you through the fundamentals of the Tokenizer UI. You'll learn how to edit, test and save an 'Email to ID' transformer.
Step 1: Open the Policies Page

The Tokenizer Policies Page
Select a tenant in the top nav and then click Policies in the left hand nav to open the Policies page. Here, you will see a list of every access policy and data transformer in this tenant.
Step 2: Open the Email to ID Transformer
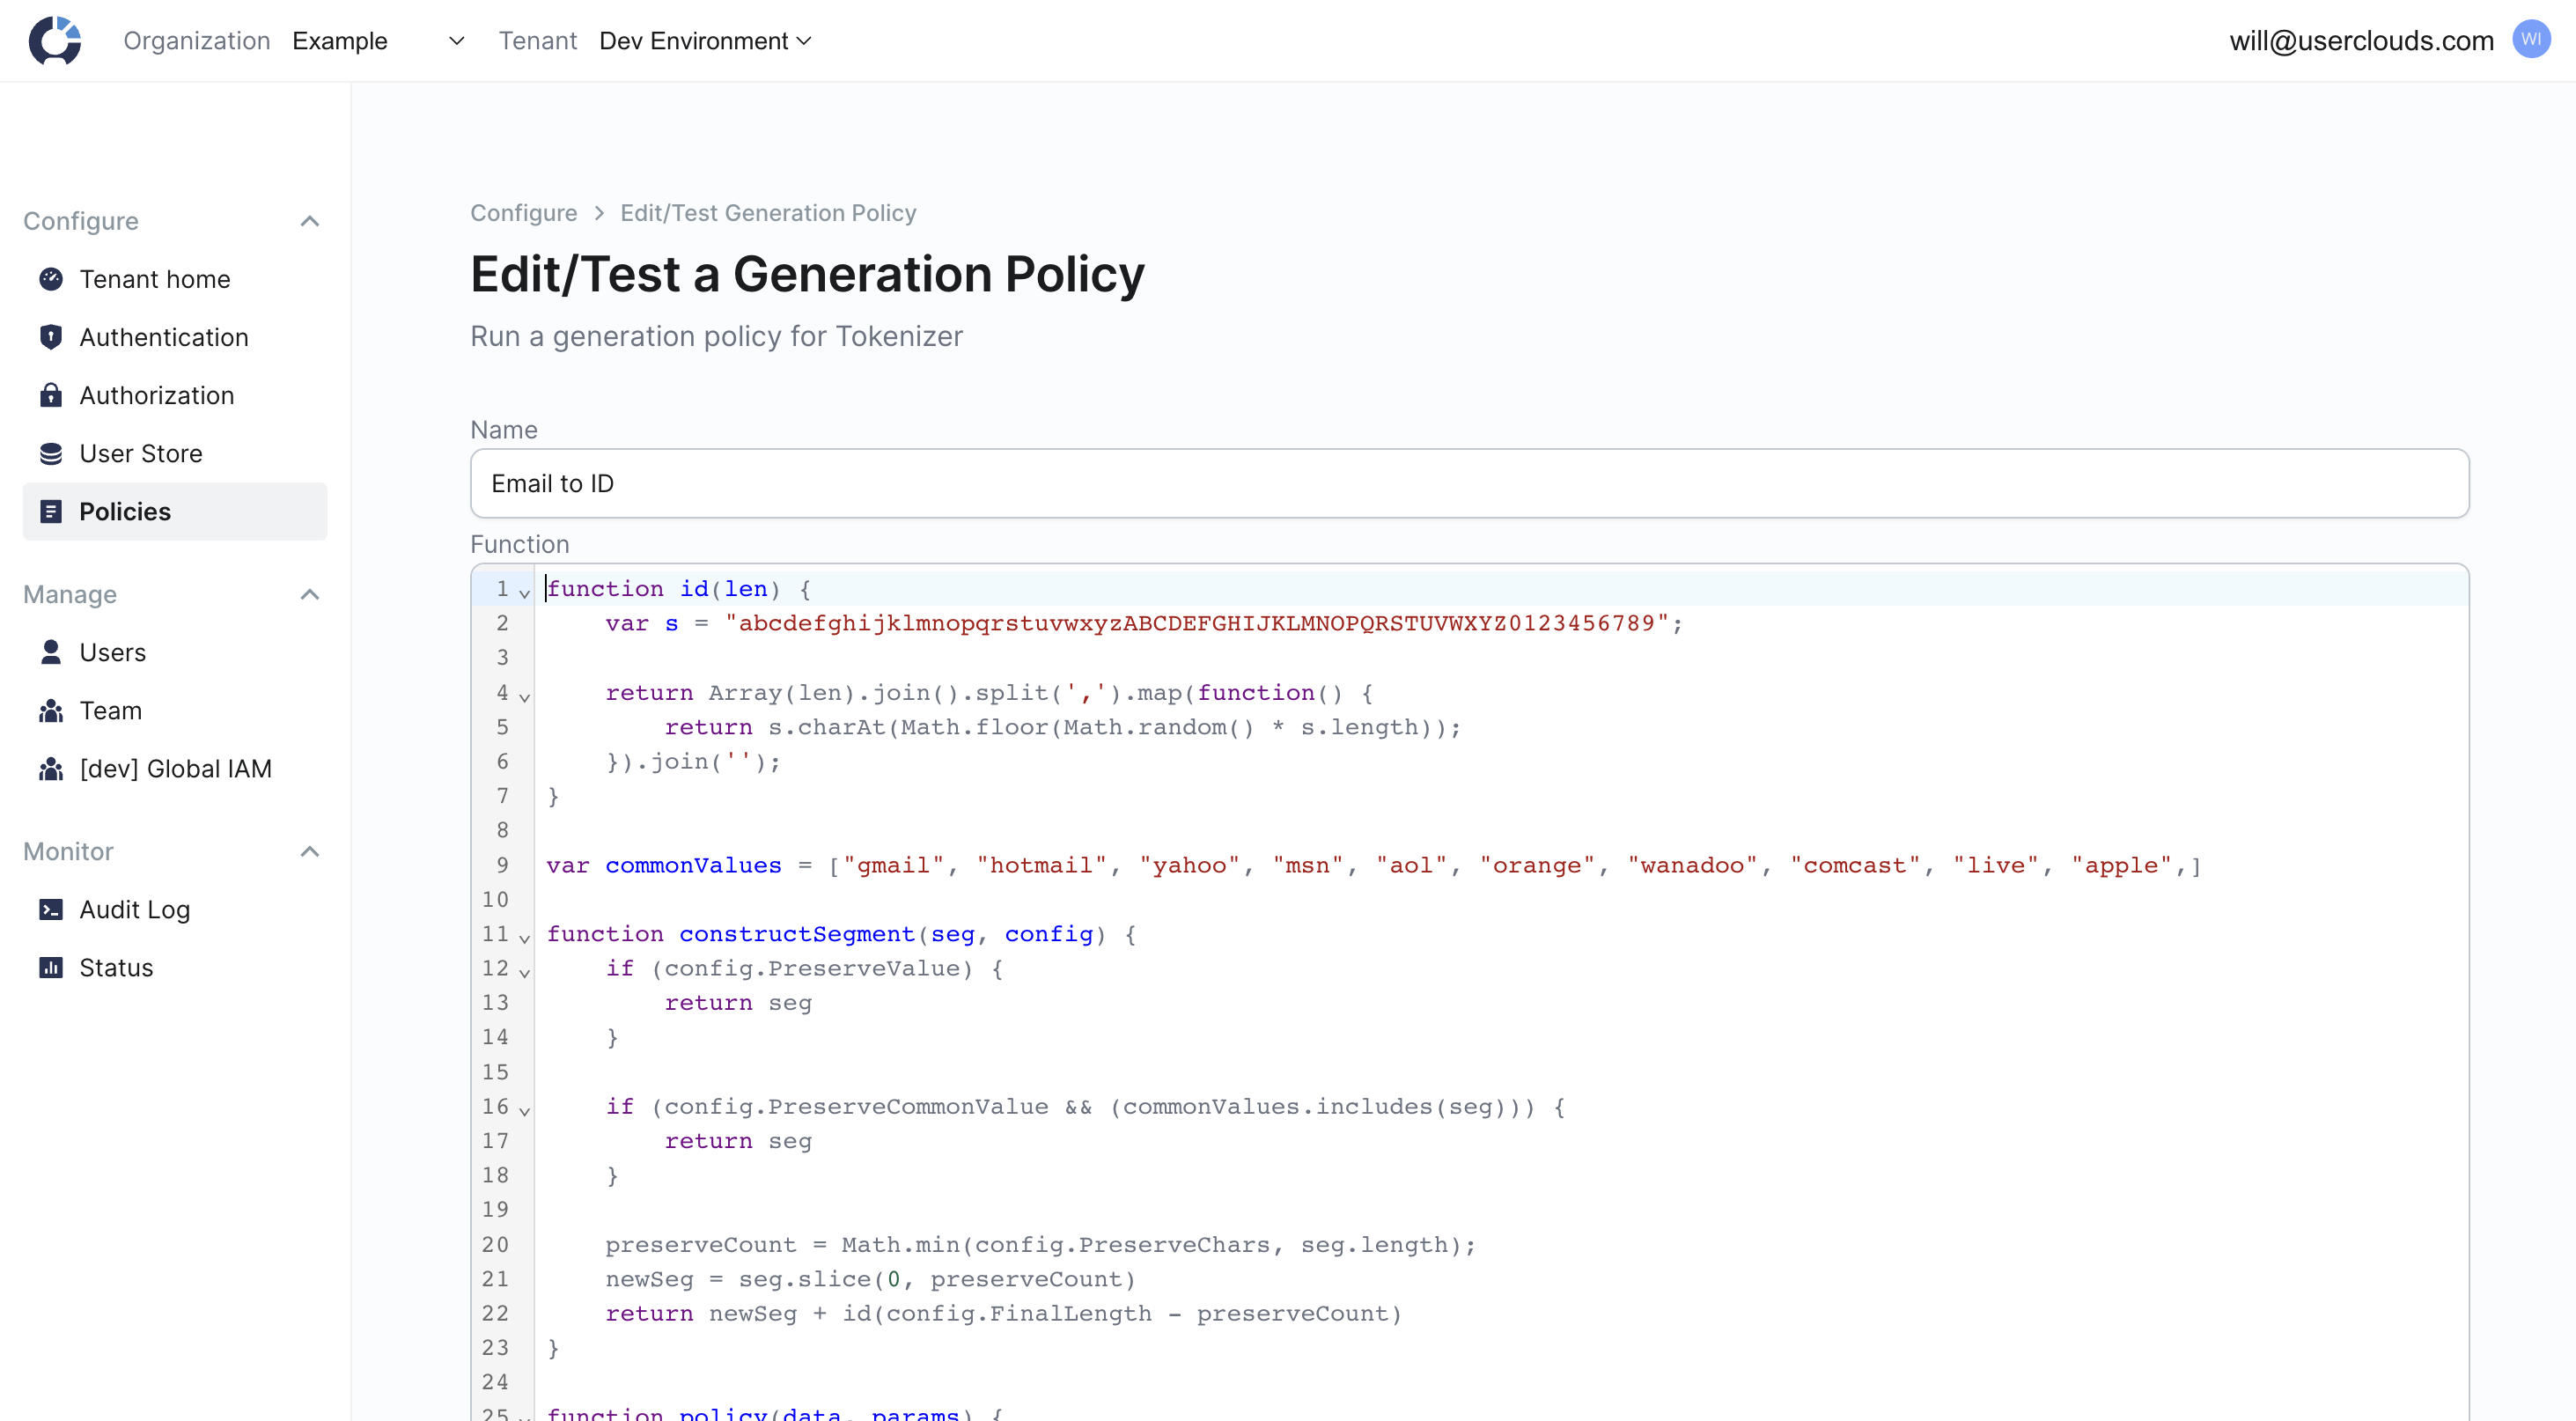
The Tokenizer Transformer Page - for creating, editing and testing transformers
In the Transformers card, open the Email to ID policy. You will land on the function editing page. Here you will see several pre-filled inputs, defining the Email to ID Policy:
- Function: Practically, transformers are parametrizable JavaScript functions. This field is the bulk of your policy. It defines the logic of the policy and the default parameter format.
- Parameters: Parameters are used to customize your transformer to different use cases without creating duplicate code. They help to keep your codebase streamlined and minimize the costs of updates to common policies.
- Test data: This input is not part of your transformer. It is just used to test the transformer through the UI on this page.
In this example, we won’t edit the function directly. We’ll just change the parameters.
Step 3: Edit Your Parameters
Replace the pre-fill parameters with this code block.
[{
    "PreserveValue": false,
    "PreserveChars": 1,
    "FinalLength": 10
}, {
    "PreserveValue": false,
    "PreserveCommonValue": true,
    "PreserveChars": 1,
    "FinalLength": 6
}, {
    "PreserveValue": true
}]
Here, we are changing two parameters:
- We’ve increased PreserveChars to 1, meaning that the first character will be preserved by the generation policy.
- We’ve changed PreserveCommonValue to true, meaning that common email domains like “gmail.com” will be preserved during tokenization.
Step 4: Test Your Function
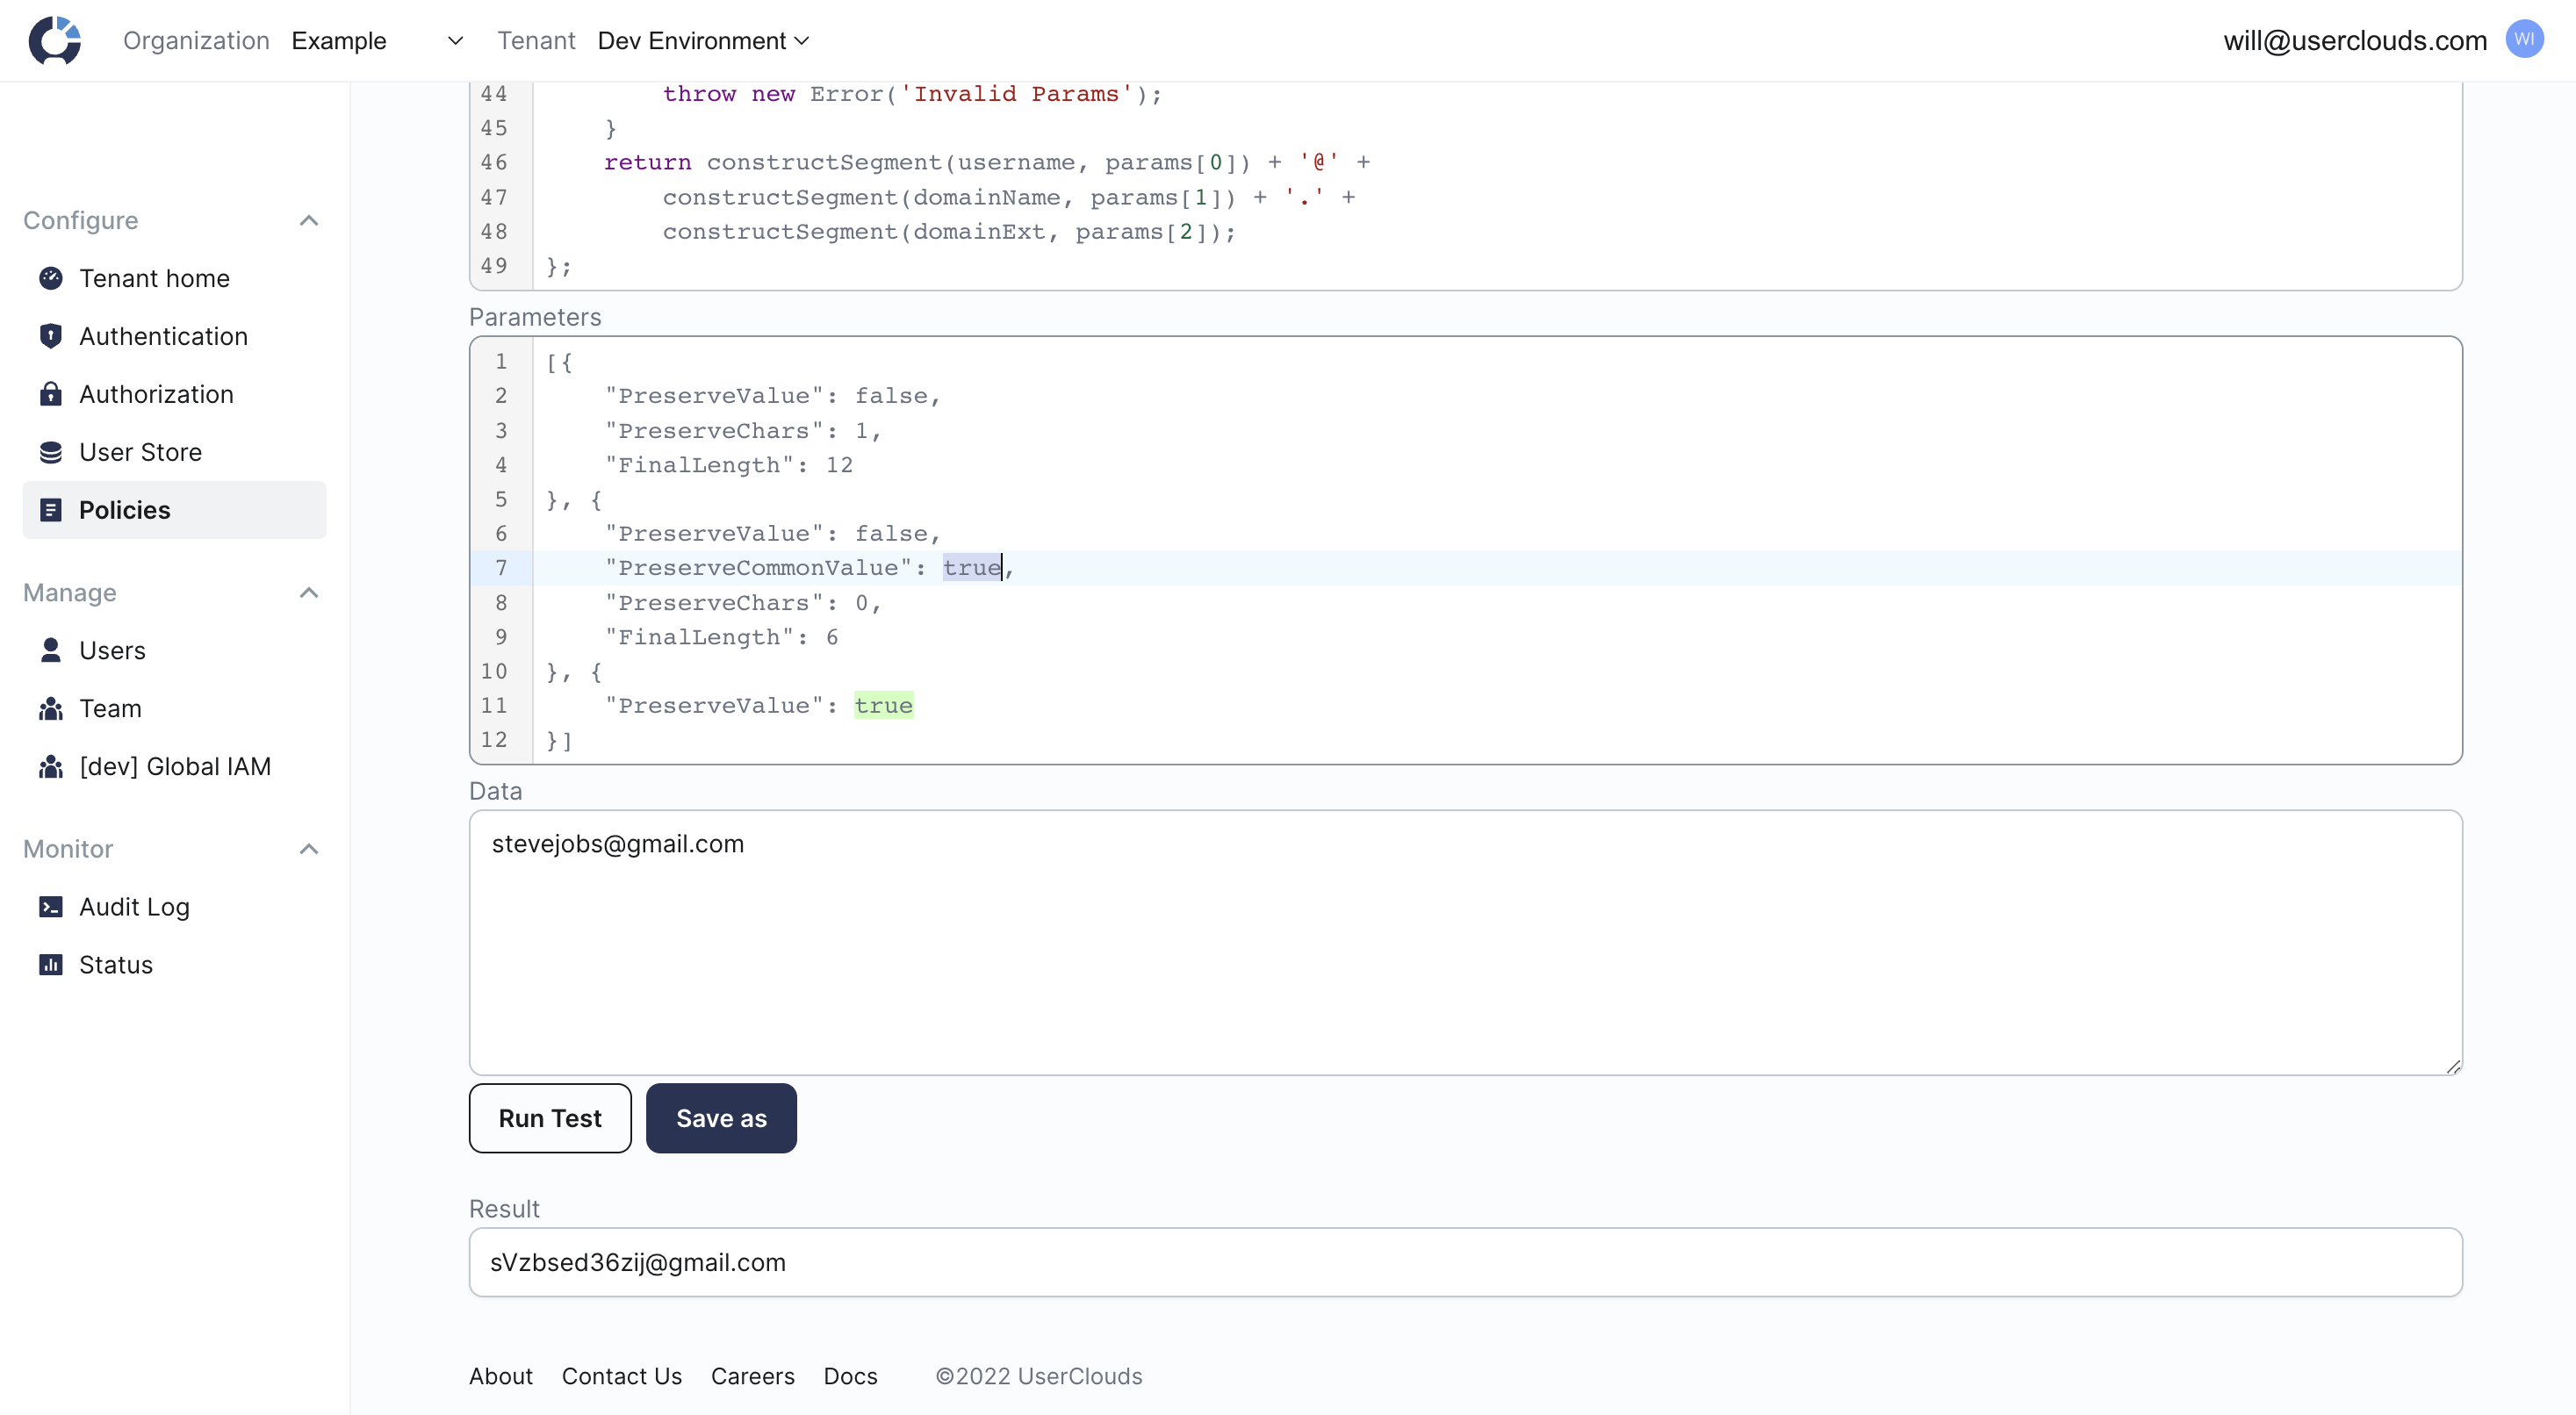
Insert test data into the data input, and click run test to generate the function. With these parameters, the first letter of the email address and common domains (including @gmail.com) will be preserved.
You can test your function by copying an email address into the test data field and clicking run test. The test output field will display your result. Now try testing your function with two different email addresses:
- [email protected] will generate a random string, starting with an s and ending with “@gmail.com”
[email protected] will generate a random string, starting with an s, featuring an “@” ending with “.com” - You can validate your functions by testing them this way in the user interface, or by testing them programmatically using the Tokenizer SDK.
Step 5: Save Your Transformer
To save your function, change the name and click Save As. Nice work! You've completed this tutorial and are ready to implement Tokenizer in your application!
Updated over 1 year ago