EdTech Platform
This article explains how to design a graph-based authorization model for Slack. The article assumes you are familiar with our Key Concepts and Attribute Scopes.
There are four steps to design a model:
- (a) list the design requirements for the permissions system
- (b) define the types of objects that the authorization logic will consider
- (c) define the types of relationships between those types of objects. Since relationships are reflected by edges in the graph, we call this “defining the edge types”
- (d) attach these permissions to these relationships using attributes
In general, model design is an iterative process. While this article is presented linearly, you might expect to loop through these steps until you’ve hit on the cleanest model structure.
A. List Design Requirements
Suppose you are an educational technology company and want to create a permissions system that decides who can view each user’s grades. You might want to define permissions such that:
- Students can view their own grades
- Parents can view the grades of all their children
- Teachers can view the grades of every student in their class
- Principals can view the grades of every student in their school
Serving this use case in a role-based (RBAC) system would be highly complex. For every class, you would need to define a teacher_of_this_class role. And for every child, you would need to define a parent_of_this_child role. This would require almost as many roles as users!
With GBAC, this system becomes simple to implement. GBAC can natively reflect the relationships between the schools, classes and different user types. This extra level of native abstraction saves you from creating class-specific and user-specific roles
B. Define the types of objects to consider
First, we define our object types. Every object in the system must have exactly one object type. This means we should not define separate object types for principals, teachers, parents and students. After all, teachers can be parents too!
Together, the following types make an effective, mutually exclusive representation of the core elements of our real-world system:
- Schools
- Classes
- Users
- Grades
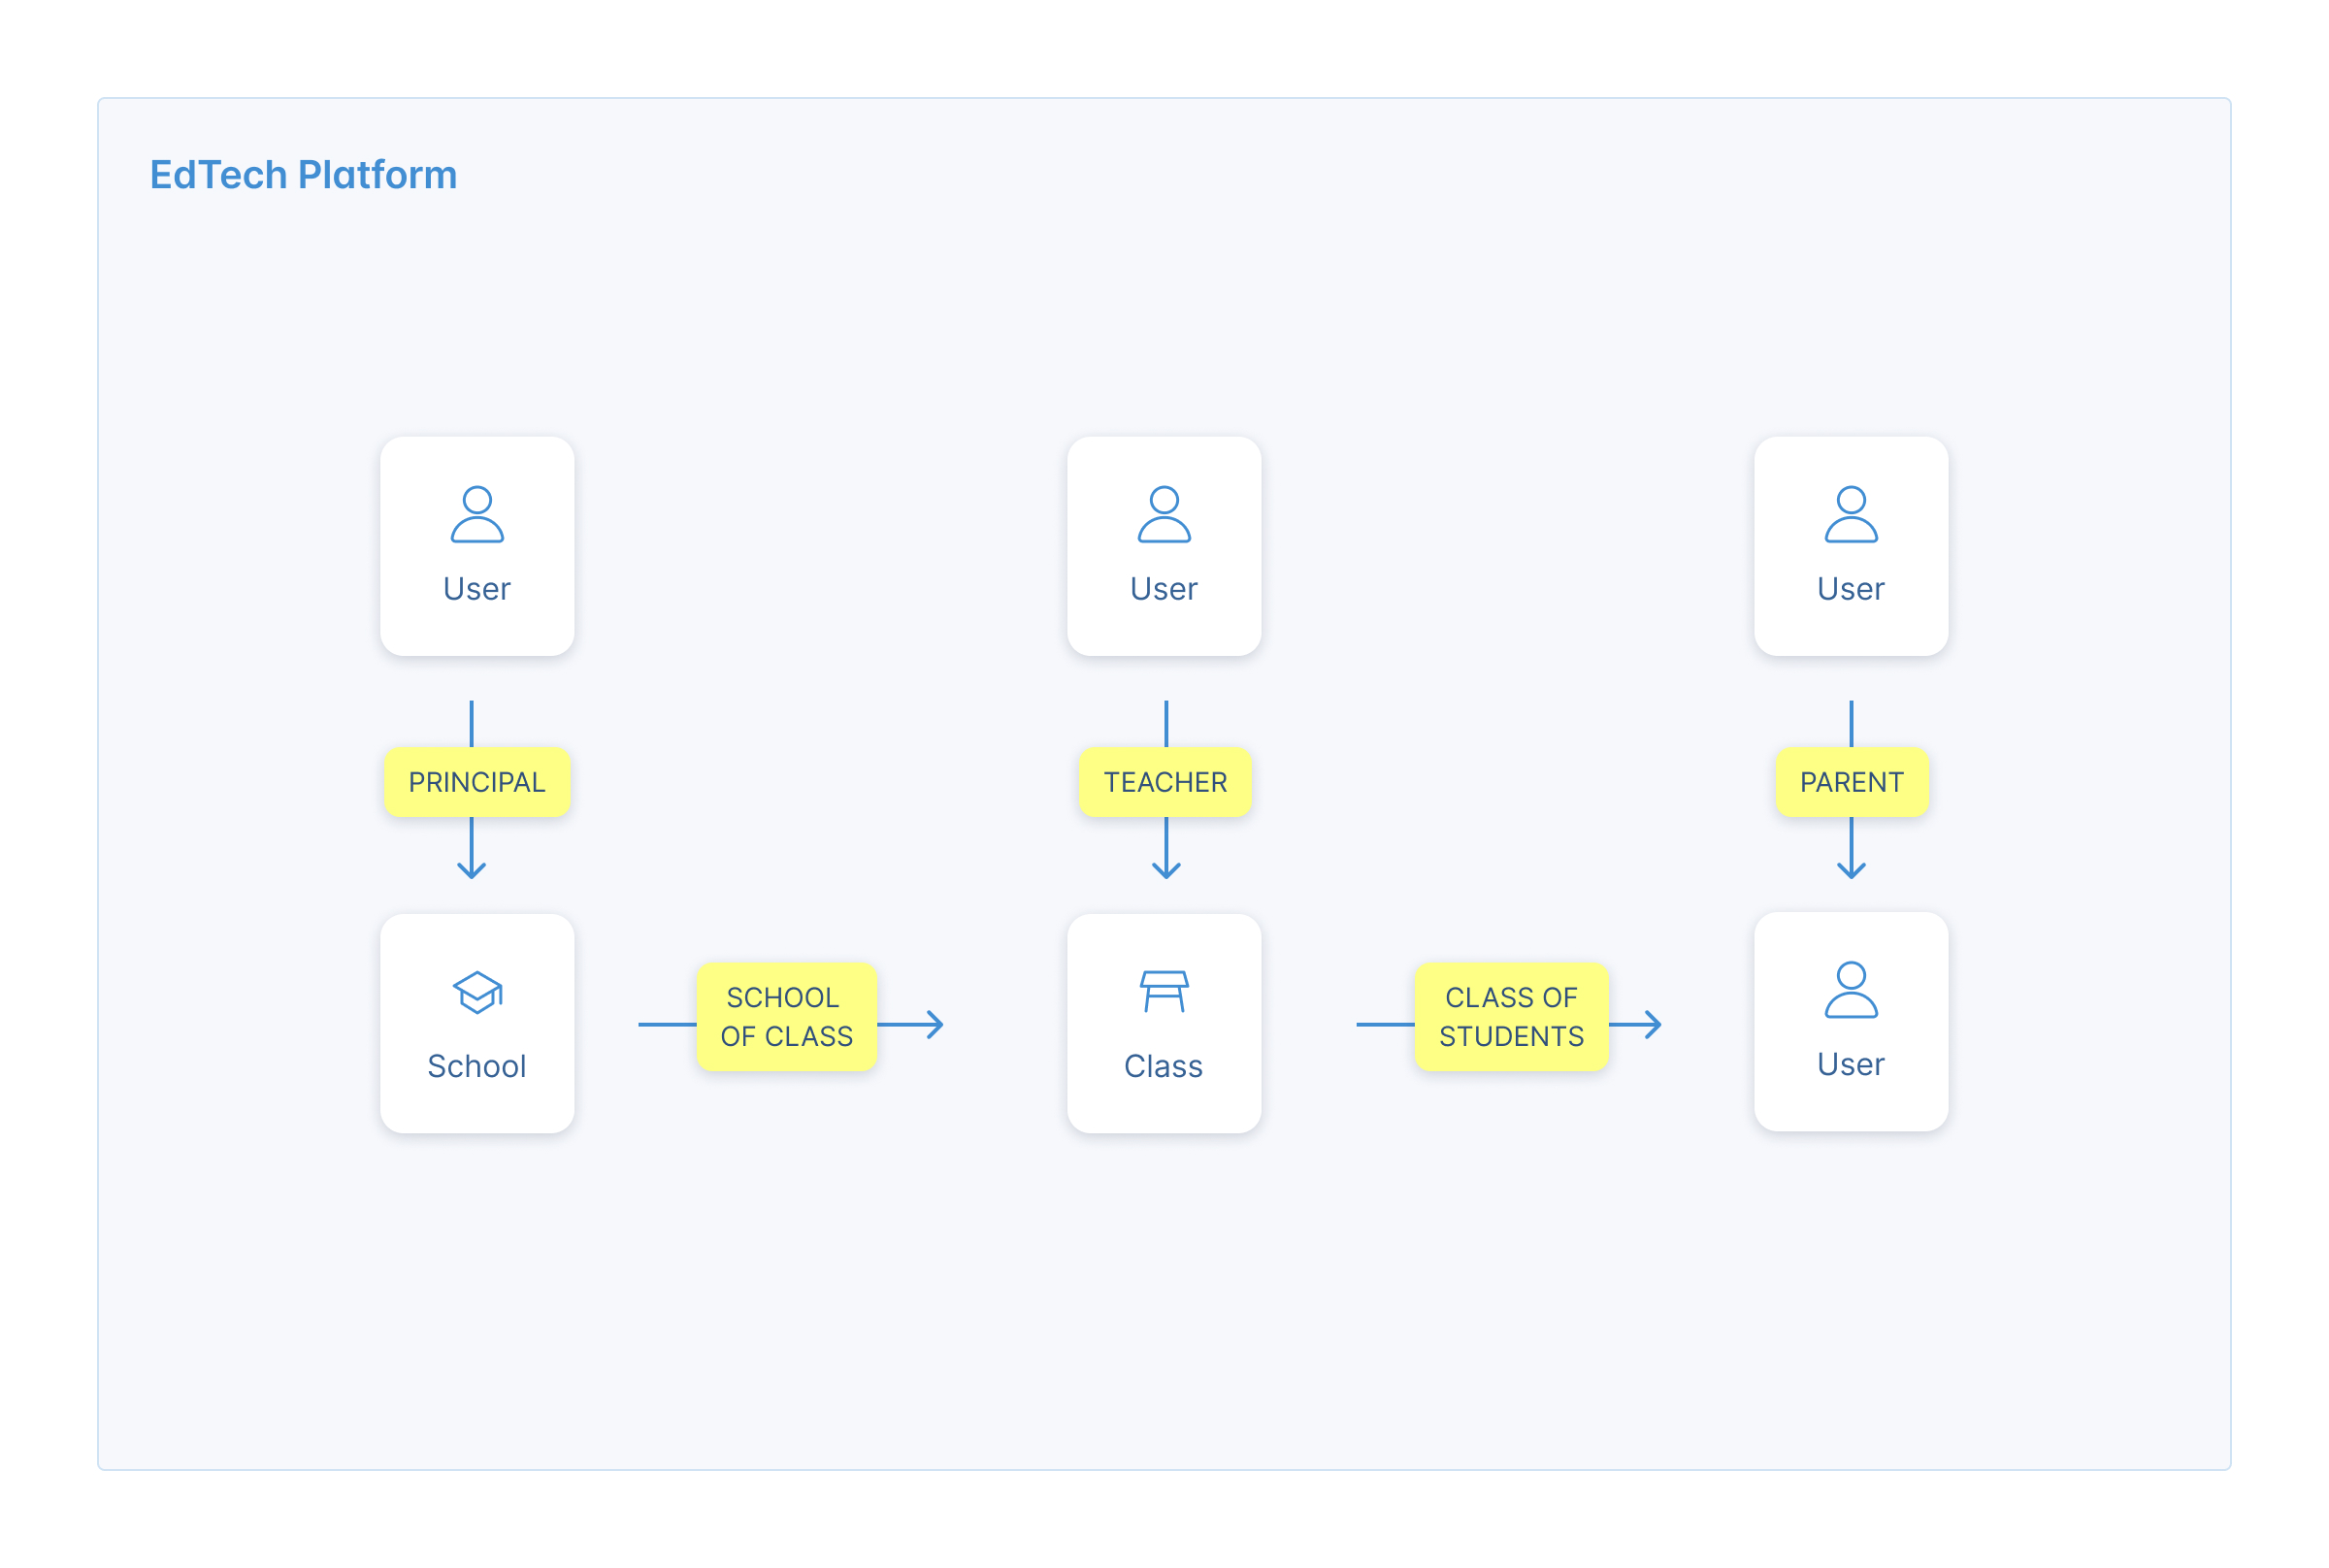
C. Define the edge types
Next, we define the edge types. Each edge type represents a possible one-way relationship between two object types. Every edge must have a type, so our list of edge types should be comprehensive: any type of relationship that we use in our authorization logic should be reflected here.
Here is a good set of edge types for our use case:
- User → School Relationships:
Principal_Of_School: User (source) can be a principal of a School (target)School_Of_Student: User (target) can be a student of a School (source)
- User → Class Relationships
Teacher_Of_Class: User (source) can be a teacher of a Class (target)Class_Of_Student: User (target) can be a member of a Class (source)
- User → User Relationships
Parent_Of: User can be a parent of a UserIs_Self: User is User
- Class → School Relationships
Belongs_To: Class can belong to a School
Note that edge types represent possible one-way relationships between two types of objects. For example, Parent_Of is a one-way relationship between two users. An edge with type Parent_Of could not link a specific user with a specific school, since people cannot be parents of schools.
D. Add permissions to each of our relationships.
To add attributes, we'll go through our design requirements, one-by-one.
Students can view their own grades
This is the simplest case. For every user, we will create an Is_Self edge from that user to themselves. We can add a view:direct attribute to the Is_Self edge type. Direct attributes give the source object (the user) the permission on the target object (the same user).
Parents can view the grades of all their children
This is also straightforward. We will add a view:direct attribute to the Parent_Of edge type. Whenever a user is a parent of another user, we will add a Parent_Of edge. The view:direct attributes will give the source object (the parent) the permission on the target object (the child).
Teachers can view the grades of every student in their class
This example is more complex. We will add attributes to the two edge types that link teachers and students of a given class:
- Teacher_Of_Class: We will add a view:direct attribute here. This gives the source object (the teacher) view permission on the target object (the class).
- Class_Of_Student: We will add a view:propagate attribute here. This means that if a third object has a permission on the source object (the class), it also gains it on the target object (the student).
Together, these attributes mean that a given teacher will get view permissions on any student in their classes.
Principals can view the grades of every student in their school
This use case is similar to the previous one. We leave it to you - dear reader - to figure it out! Contact [email protected] if you have questions.
Wrap
Our graph's structure now reflects the real-world relationships that determine our permissions. Once we populate the graph with instances of objects and edges, we have all the data we need to run our permission system. When a user tries to view another user’s grades, our client can call CheckAttribute to ask: does User X have Permission Y on Resource Z?
While an RBAC solution would have required almost 1 role per user, using GBAC has allowed us to create a scalable solution with just 3 object types and 6 edge types. This vastly reduces the complexity of creating, testing and maintaining our permissions system.
Updated 11 months ago